@EmilySticco and I spent the semester integrating Technology into her #BitsOfMusic 8th Grade Music elective. Our first project involved constructing cardboard instruments and making them play music with MakeyMakeys and Scratch. You can see posts about that project here.
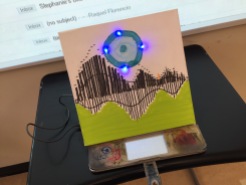
Our second project entailed having students compose original music in Garageband. Students then designed and painted an album cover on a 12×12″ canvas and strung it with LEDs in parallel circuits – this required using wire cutters, wire strippers, an awl, and needle nose pliers. Lastly, an Arduino was attached to get the LEDs to light up in patterns that complimented their music.
Each color of LED was connected in an autonomous parallel circuit – I described these as “tracks” – and I asked students to color code their tracks using the same color wire as the LED when possible for the positive leg (the anodes) and black for the grounded leg (the cathodes).
These were inaugural units, and Emily are I are really proud of our plans and our students’ work. We’re hopeful it will be even better next year – for instance, we’d like there to be some sort of microphone or sensor input which recognizes particular pitches causing different color LEDs to light up. That would be awesome…
Here’s a video of my cardboard prototype with three colors of simultaneously looping flashing LEDs:
Here are photos taken while building my cardboard prototype:
Here is a student’s finished album cover with one color of LEDs:
Here is a student’s finished album cover with two colors of LEDs:
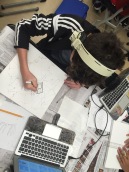
Here are photos of the 8th graders designing and wiring their light-up album covers:
Different Arduino programs or “sketches” were used in this project due to time constraints and the level of difficulty employed by each student’s design. Here are two examples below which students could alter with different numbers in order to blink lights on (HIGH) and off (LOW):
1. This first one has up to three LEDs lighting up one after the other rather than simultaneously using the delay command.
// the setup function runs once when you press reset or power the board
void setup() {
// initialize digital pins 11, 12, and 13 as outputs.
pinMode(13, OUTPUT);
pinMode(12, OUTPUT);
pinMode(11, OUTPUT);
}// the loop function runs over and over again forever
void loop() {
digitalWrite(13, HIGH); // turn the LED on (HIGH is the voltage level)
delay(200); // wait for 2/10 of a second
digitalWrite(13, LOW); // turn the LED off by making the voltage LOW
delay(100); // wait for 1/10 of a second
digitalWrite(12, HIGH); // turn the LED on (HIGH is the voltage level)
delay(200); // wait for 2/10 of a second
digitalWrite(12, LOW); // turn the LED off by making the voltage LOW
delay(100); // wait for 1/10 of a second
digitalWrite(11, HIGH); // turn the LED on (HIGH is the voltage level)
delay(200); // wait for 2/10 of a second
digitalWrite(11, LOW); // turn the LED off by making the voltage LOW
delay(100); // wait for 1/10 of a second
}
2. This second one has up to three LEDs lighting up simultaneously without the delay command. (I found the code in this post here).
/* Blink Multiple LEDs without Delay
* Turns on and off several light emitting diode(LED) connected to a digital pin, without using the delay() function. This means that other code can run at the same time without being interrupted by the LED code.*/int led1 = 11; // LED connected to digital pin 13
int led2 = 12;
int led3 = 13;int value1 = LOW; // previous value of the LED
int value2 = LOW;
int value3 = LOW; // previous value of the LEDlong time1 = millis();
long time2 = millis();
long time3 = millis();long interval1 = 1000; // interval at which to blink (milliseconds)
long interval2 = 500;
long interval3 = 250;void setup()
{
pinMode(led1, OUTPUT); // sets the digital pin as output
pinMode(led2, OUTPUT);
pinMode(led3, OUTPUT);
}void loop()
{
unsigned long m = millis();if (m – time1 > interval1){
time1 = m;if (value1 == LOW)
value1 = HIGH;
else
value1 = LOW;digitalWrite(led1, value1);
}if (m – time2 > interval2){
time2 = m;if (value2 == LOW)
value2 = HIGH;
else
value2 = LOW;digitalWrite(led2, value2);
}
if (m – time3 > interval3){
time3 = m;if (value3 == LOW)
value3 = HIGH;
else
value3 = LOW;digitalWrite(led3, value3);
}
}


Pingback: Thanks, @techlearning! Sneak Peak with @EmilySticco of our #ISTE2016 poster session “Bits of Music”! | Karen Blumberg
Pingback: So thrilled to present #BitsOfMusic with @EmilySticco at #ISTE2016! #MakerEd | Karen Blumberg
I LOVE this! Thanks for sharing. I may be in touch to learn more.
LikeLiked by 1 person
Thanks! Always happy to chat. Can also put you in touch with Emily Sticco!
LikeLike
You can use WS2811 or 2812 and enjoy full color RGB. You can also easily control the effects using an Arduino with one wire.
LikeLike